Español
 عربى
عربىContent
- 1 Tools & Materials You'll Need
- 2 Types of Home Storage Racks Compared
- 3 Step-by-Step Assembly Instructions
- 3.1 Step 1: Read the Manual and Inventory All Parts
- 3.2 Step 2: Choose and Prepare the Location
- 3.3 Step 3: Assemble the Bottom Shelf Frame
- 3.4 Step 4: Raise the Frame and Add Remaining Shelves
- 3.5 Step 5: Install Diagonal Bracing
- 3.6 Step 6: Tighten All Hardware and Level the Unit
- 3.7 Step 7: Anchor to the Wall (Recommended)
- 3.8 Step 8: Load Test and Final Check
- 4 Pro Tips for a Sturdier, More Functional Build
- 5 Common Mistakes to Avoid
- 6 Frequently Asked Questions
- 6.1 Q: How long does it take to assemble a home storage rack?
- 6.2 Q: Do I need to anchor a storage rack to the wall?
- 6.3 Q: Can I adjust shelf heights after the rack is assembled?
- 6.4 Q: What is the best type of storage rack for a garage?
- 6.5 Q: How do I stop my storage rack from wobbling?
- 6.6 Q: Are plastic storage racks as strong as metal ones?
- 6.7 Q: Can I assemble a storage rack on carpet?
- 7 Final Thoughts
Quick Answer: To assemble a home storage rack, start by laying out all parts and hardware, then build the vertical frame posts, attach horizontal shelf supports tier by tier, lock shelves into place, and finally level and secure the entire unit. The full process typically takes 30–90 minutes depending on rack type and size.
A home storage rack is one of the most effective ways to organize a garage, pantry, basement, or utility room. Whether you're installing a heavy-duty metal shelving unit for the garage or a lightweight wire storage rack for the kitchen, the assembly process follows a clear, repeatable sequence. This guide walks you through every step — from tools to troubleshooting — so you can build your storage rack with confidence.
Tools & Materials You'll Need
Before starting your storage rack assembly, gather everything listed below. Having tools on hand saves time and prevents the frustration of mid-build interruptions.
Essential Tools
- Rubber mallet — for snapping shelf clips and connectors into place without damage
- Phillips-head screwdriver or power drill — for bolt-based systems
- Level (spirit or digital) — to ensure shelves are perfectly horizontal
- Tape measure — to verify spacing and positioning
- Work gloves — metal edges can be sharp
- Safety glasses — especially when cutting zip ties or using power tools
Materials in the Box (Typical)
- Vertical upright posts (usually 2–4 pieces)
- Shelf panels or wire grids
- Horizontal beam connectors or brackets
- Nuts, bolts, or clip-lock hardware
- Diagonal bracing rods for stability
- Foot pads or leveling feet
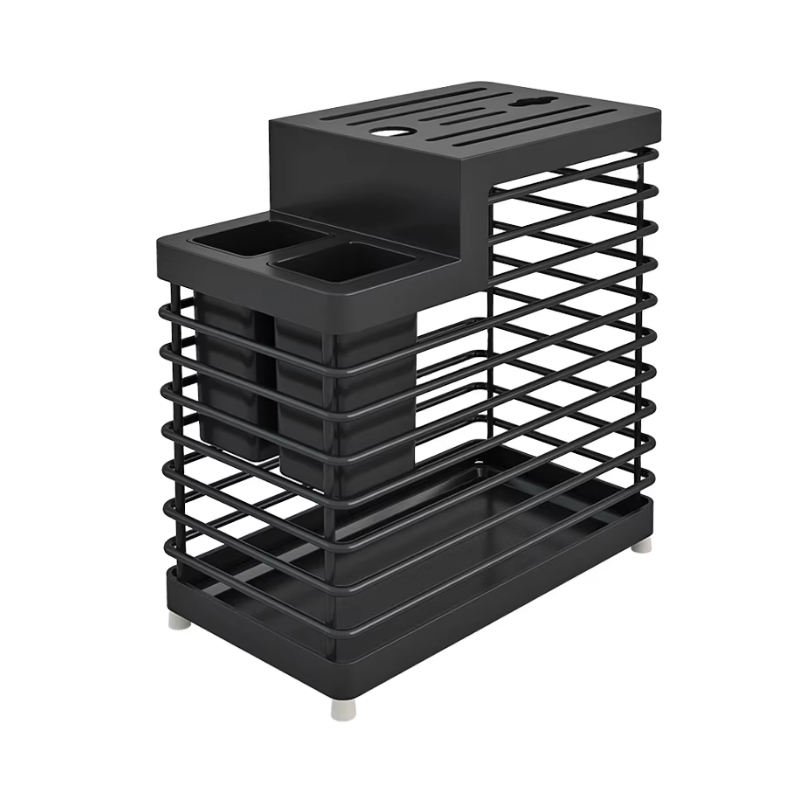
Types of Home Storage Racks Compared
Not all home storage racks are built the same. The table below compares the most common types to help you understand what you're assembling and what to expect.
| Rack Type | Material | Weight Capacity | Best For |
| Wire Shelving Rack | Coated steel wire | 100–300 lbs | Kitchen, pantry, closet |
| Bolt-Together Metal Rack | Heavy steel | 500–2000 lbs | Garage, warehouse |
| Rivet Rack (Boltless) | Steel with clip rivets | 300–1500 lbs | Garage, basement |
| Plastic Utility Rack | Heavy-duty resin | 100–250 lbs | Laundry, light storage |
| Wall-Mounted Rack | Steel / wood hybrid | 50–500 lbs | Tools, bikes, sports gear |
Step-by-Step Assembly Instructions
The following steps apply to the most common freestanding metal storage rack, including boltless rivet racks and wire shelving systems. Adapt them as needed for your specific model.
Step 1: Read the Manual and Inventory All Parts
Before touching a single piece, read the instruction manual from start to finish. Lay all components on a clean floor and cross-check against the parts list. Count bolts, clips, and brackets. Missing hardware at Step 5 is far more frustrating than verifying at Step 0. Separate parts into labeled groups (posts, shelves, connectors, hardware).
Step 2: Choose and Prepare the Location
Select a flat, dry surface. For garage storage racks, keep them at least 3 inches from the wall to allow air circulation. Measure the footprint against your floor space. Mark the four corner positions with painter's tape. If you plan to anchor the rack to a wall (recommended for tall units), locate the wall studs now using a stud finder.
Step 3: Assemble the Bottom Shelf Frame
Start at the base. Lay two vertical upright posts parallel on the floor, spaced to match your shelf width. Insert the bottom horizontal beam connectors (or snap-in clips for wire shelving) into the post holes. For bolt-type systems, hand-tighten only — do not fully torque bolts until the entire frame is square. Add the bottom shelf panel and confirm it sits flush and level.
Step 4: Raise the Frame and Add Remaining Shelves
With a helper if possible, stand the bottom frame upright. Attach the remaining posts to form the full rectangular frame. Work upward, installing shelves tier by tier. For wire rack shelving, twist the plastic sleeves clockwise onto the posts to lock each shelf at your desired height. Use a tape measure to keep shelf spacing consistent across all four corners.
Step 5: Install Diagonal Bracing
Most heavy-duty storage racks include rear diagonal braces or cross-bar supports. These are critical — do not skip them. Diagonal bracing prevents side-to-side racking (swaying), which is the primary cause of rack collapse under load. Hook the brace onto the designated notches and tighten the accompanying hardware.
Step 6: Tighten All Hardware and Level the Unit
Now fully tighten all bolts in a diagonal pattern (not circular) to distribute force evenly. Place your spirit level across each shelf — adjust the leveling feet at the base until every shelf reads perfectly flat. A rack that leans even slightly will shift over time under load.
Step 7: Anchor to the Wall (Recommended)
For any storage rack taller than 5 feet, wall anchoring is strongly advised. Use the anti-tip strap or L-bracket included with many units. Drive the anchor into a wall stud, not just drywall. This single step dramatically reduces tipping risk, especially in households with children or in earthquake-prone regions.
Step 8: Load Test and Final Check
Before loading your full inventory, do a load test: place 20–30 lbs on each shelf and observe for any creaking, shifting, or leaning. Re-check the level. Inspect all clips and bolts visually. If everything is stable, proceed with organizing your items — heavier objects always on lower shelves.
Pro Tips for a Sturdier, More Functional Build
Spacing and Weight Distribution
- Place the heaviest items on the bottom two shelves. This lowers the center of gravity and reduces tipping risk.
- Don't exceed the per-shelf weight rating — always check the spec sheet. Overloading a single shelf is more dangerous than total overload.
- Distribute weight evenly front-to-back and left-to-right on each shelf surface.
Environment-Specific Advice
- Garage: Use coated or galvanized steel racks to resist humidity and temperature swings. Add rubber foot pads to prevent floor scratches and rust transfer.
- Pantry / Kitchen: Wire shelving is ideal — it allows air circulation and makes spills easy to clean. Add shelf liners for small items.
- Basement: Keep racks at least 6 inches off the floor if flooding is a risk. Use waterproof bins on lower shelves.

Common Mistakes to Avoid
Even experienced DIYers make these errors. Review the table below before starting.
| Mistake | Why It Matters | Fix |
| Skipping diagonal bracing | Rack can collapse sideways under load | Always install all included braces |
| Over-tightening early | Makes squaring the frame impossible | Hand-tighten until fully assembled |
| Not leveling the unit | Items slide; rack shifts over time | Use adjustable feet and a level |
| Heavy items on top shelves | Raises center of gravity; tipping risk | Always load bottom-heavy |
| Ignoring wall anchoring | Tall racks can tip with a single pull | Anchor to wall studs for any rack >5 ft |
| Assembling alone (large racks) | Frame can fall during raising | Always use a helper for units >4 ft tall |
Frequently Asked Questions
Q: How long does it take to assemble a home storage rack?
Most standard freestanding storage racks take between 30 and 90 minutes for one person. A heavy-duty garage shelving unit with bolt assembly can take up to 2 hours. Having a helper cuts time by roughly 30–40%.
Q: Do I need to anchor a storage rack to the wall?
For racks under 4 feet tall with a wide base and low load, anchoring is optional. For any storage rack taller than 5 feet, anchoring to a wall stud is strongly recommended — particularly in homes with children, pets, or seismic activity.
Q: Can I adjust shelf heights after the rack is assembled?
Yes, on most boltless rivet racks and wire shelving systems, you can adjust shelf height by unloading the shelf, releasing the clips or rivets, and repositioning. With bolt-together systems, you'll need to partially disassemble the section you want to adjust.
Q: What is the best type of storage rack for a garage?
For most homeowners, a boltless steel rivet rack (such as Edsal, Muscle Rack, or Husky brand units) offers the best balance of capacity, ease of assembly, and cost. These can hold 1,000–2,000 lbs total and assemble without special tools. For extremely heavy loads (e.g., engine parts, bulk supplies), bolt-together steel shelving is preferable.
Q: How do I stop my storage rack from wobbling?
Wobbling is almost always caused by one of three issues: missing diagonal bracing, an uneven floor (fix with leveling feet), or loose hardware (re-tighten all bolts). Wall anchoring eliminates residual wobble entirely on freestanding racks.
Q: Are plastic storage racks as strong as metal ones?
No. Heavy-duty resin racks typically max out at 200–250 lbs total capacity, compared to 1,000–2,000 lbs for steel units. Plastic racks are lighter, easier to clean, and won't rust — making them ideal for laundry rooms and light household use, but unsuitable for heavy garage storage.
Q: Can I assemble a storage rack on carpet?
You can, but it's not ideal. Carpet makes leveling difficult, and rack feet may sink unevenly over time, especially under heavy loads. Use large rubber foot pads or a solid plywood base underneath the feet to distribute the load and maintain stability.
Final Thoughts
Assembling a home storage rack is a straightforward project that pays dividends in space, organization, and peace of mind. The keys to success are simple: inventory your parts, build from the bottom up, never skip the diagonal bracing, level carefully, and anchor tall units to the wall. Whether you're setting up a pantry wire shelf, a garage metal shelving unit, or a basement utility rack, the process outlined above will get you to a safe, sturdy, and well-organized result.